Get Paid To Promote, Get Paid To Popup, Get Paid Display Banner

Sunday, March 29, 2009

Harley Davidson Pecos Motorcycle Boot Review

Harley Davidson Pecos Motorcycle Boot Review

When I was getting geared up for the Motorcycle Safety Foundations Basic Rider Course I was looking for a black biker boot that looked more like a cowboy boot than the regular bikers engineer boot. One day at lunch I was browsing a local bike shop in Grapevine Texas called Biker Alley, which has since closed, and found what I was looking for. They were Harley Davidson brand and were a cross between an engineer boot and a cowboy boot. The price was reasonable and I purchased a pair.

The boots looked great but after wearing for several hours in the rain they became soaked and my feet were all wet. So, I went looking for something to make then more water repellent. I picked up a can of Penguin brand Himalaya Wax and coated them excessively. Then I polished them up to a beautiful black leather shine. Himalaya Wax is made of beeswax and is very water repellant. My feet have been dry since, however I have not had them immersed in water for any great length of time.

I have had the Pecos boots now for over a year and they have held up well. I do not wear them every day. Usually I wear them on Fridays, on days that are raining, or when it looks like it might rain. The leather has held up well, even the top of the left one, used for up shifting. They have picked up some minor scuffs, but do not look that bad for not having polished them again. For sturdiness and protection these boots are equipped with an inside metal support shank.

The Harley Davidson boots are as comfortable to wear as any good quality made boot should be. Rumor has it that Wolverine manufactures these boots for Harley. There is a metal insignia plate with the Harley Davidson Logo on it located on each heel. The tooled leather straps with steel harness hoop are riveted together. As a nice touch Harley Davidson Motor Co written around the head of each rivet. The uppers are constructed of supple full grain leather. The stitching is of good quality and the pull tabs have lasted with me using them to pull and tug the boots on every time I wear them.

The soles of the Harley Pecos boots are made of Goodyear welted construction. A Goodyear welt construction is good for water protection and the possibility of resoling. The Dual-density rubber/EVA outsole is oil, water, and slip resistant. The traction of the Pecos boot is good on cement and blacktop roads, but get them on wet painted or polished smooth cement and they are not so slip resistant. Part of the tread pattern is bright orange in color and is very aggressive. The Harley Davidson logo is embossed on the sole shank towards the heel. There are parts of the sole that are starting to wear smooth from all my walking and riding in them.

The interior of the Pecos boot is lined with a full length cushion sock made of Taibrelle. This liner helps wick perspiration away from your feet. The insole is removable and is made of dual-density polyurethane for comfort. These boots are very comfortable to wear, but may take some time to get used too if you have never worn boots with a true heel on them.

If you enjoy wearing a comfortable pair of cowboy boots but want something to ride your motorcycle in, these boots fit the bill. I have enjoyed wearing and riding in these boots. They offer a lot of protection for your feet, ankles, shins, and calves. Torch gives the Harley Davidson Pecos Motorcycle Boots a M.M.M Rating of 8 on a scale of 1-10.

Ride on,
Torch


Reblog this post [with Zemanta]

Sunday, March 22, 2009

Stebel Nautilus Compact Dual Tone Horn


Stebel Nautilus Compact Dual Tone Horn Installation on 2003 V-Star 1100 Classic & Review

One of the items on my Christmas list last year was a Stebel Nautilus Compact Dual Tone Horn for my 2003 V-Star 1100 Classic, named Mistress. Oh, did I mention they come in chrome? When Christmas came around my dear wife informed me she had ordered the horn I wanted and an installation kit to go with it. I could hardly wait for it to come in.

It came in the next week. I learned that my wife had ordered the Stebel Nautilus Compact Dual Tone Air Horn from Twisted Throttle. She also had ordered their Plug-N-Play wiring installation kit. I checked to make sure everything was there, and it was. The Horn itself came with a relay, one mounting bolt, one mounting nut, one mounting bracket adapter for mounting the horn separate from the small air pump, and directions. Twisted Throttles wiring kit came with, pre-wired relay connector, horn ground wire, two blue Posi-Lock connectors, one 30 amp ATC fuse, one six inch wire tie, six four inch wire ties, wiring directions and electrical schematic.

I decided to install the horn when I replaced the battery on my V-Star. I started by removing my Corbin Dual Tourer seat. That is accomplished by removing both seat lean backs and the nut and washers at the rear of the seat. Then I lifted the seat assembly up from the rear while pulling the assembly rearward unhooking it from the seat holders. I made sure the fuel valve was turned to the off position, removed the fuel line, and disconnected the wiring harness going to the instrument cluster, removed the two bolts from the fuel tank bracket, removed the front ignitor unit panel quick fastener and removed the fuel tank.

With those out of the way I removed the battery side cover, disconnected the negative battery cable and then the positive cable. I went on and replaced the battery which you do not have to remove to install the Stebel Nautilus Compact Dual Tone Air Horn. I opened the wiring harness and horn packages and spread everything out ready for the install.

First I installed the relay and fuse into the wiring harness setting the relay part of the harness near where I would be mounting it under the seat. I routed the red power wire down to the battery positive cable area ready to hook up. I snaked the black and blue wires, which come twisted together, from the relay along the factory wiring harness route up to where the Original Equipment horn is located. I had previously replaced the OEM horn with a Fiamm Freeway Blaster Horn.

This is where I deviated from the instructions that came with the wiring kit. I wanted to keep the Fiamm Freeway Blaster horn hooked up so I could use both the Fiamm and the Stebel Nautilus Compact at the same time. I accomplished this by employing two Quick Splice connectors that I had on hand in my electrical supplies. I attached one to the positive, and one to the negative OEM horn wires. These simply crimp connect onto the wire using pliers. The center of the connector pinches through the wires insulation making the connection for the attached female lug. This made easy hook ups for the wiring kits male spades on the black and blue wires, blue to the positive brown horn wire and black to the negative pink horn wire.

Next I snaked the yellow wires from the relay along the factory harness under the fuel tank area and down to where I was going to mount the Stebel Horn by the rear brake master cylinder. Now it was time to mount the horn assembly itself. I had picked up a scrap piece of bracket and now needed to tweak it into the correct shape and make the mounting hole for the horn larger to fit the bolt that came with the horn.

I held the metal and horn up together where I wanted to mount the horn assembly next to the rear brake master cylinder to check clearances and get some idea where to bend the bracket. I then bent the metal bracket and re checked clearances. That done, I drilled out the hole in the end where the bolt from the horn assembly would go. The other end already had a hole to mount to the rear brake master cylinder bracket. I then removed the brake master cylinder mounting bolt and added in the new horn bracket and horn ground lead supplied by the wiring kit, and reinstalled.

Now that I had the new horn mounting bracket in place I attached the Stebel Horn assembly to it using the supplied mounting bolt and nut, making sure the horn was mounted in the correct orientation and angle as per the instructions. I hooked up the yellow power wire from the relay to the Stebel Horn power connector. Next, I connected the negative black wire from the ground at the rear brake master cylinder and the just added horn bracket, to the negative connector of the Stebel Horn.

I finished up installing the new battery by connecting all the positive leads and then the negative leads. I attached the Stebel Horn relay to the frame using a tie strap. I reinstalled the fuel tank and reconnected the electrical harness. It was time to test the horn before I put everything back together on the bike. I turned the key to the on position and hit the horn button. There was a slight delay after hitting the horn button from when the Fiamm Freeway Blaster starts and the Stebel Nautilus Compact Dual Horn kicks in. It takes a split second for the Nautilus’s air pump to get pressure to the horn. It’s worth the wait.

The Stebel Nautilus Compact Dual Tone Horn is loud. It is rated at 139 decibels and I believe it’s every bit of that. It is way louder than the Fiamm Freeway Blaster. It sounds like an 18 wheelers horn. Here is an excerpt from the Twisted Throttle website:

“Keep this in mind: sound energy doubles for every 3 points you go up in the decibel scale. It means that the Stebel Nautilus horn, which produces 139 dB of sound, puts out a LOT more sound than these popular horns: - 800% of the sound energy of the more expensive 130dB FIAMM Freeway Blaster; - 600% louder than the $140, 130 dB Pro Pad Mini Beast horn; - 650% louder than the $179, 128dB Rivco dual trumpet horn.”

Lastly I used the supplied wire ties to secure all loose wiring out of the way. I buttoned up the bike in reverse order of the disassembly and got it ready again to ride.

Just the other day I had the opportunity to use the Nautilus Compact Air Horn. It was on my commute home westbound on SH183 around Hurst Texas. A vehicle whose driver was not paying attention, was unaware or uncaring started drifting over from the center lane into the fast lane while I was in it. I guess even with his window down he could not hear my
Cobra exhaust next to him above all the traffic noise. I hammered on the horn button and the Stebel responded with a very loud honk. He stopped moving into my lane but was still straddling the white line so I just sped up and got out of there.

The Nautilus Horn worked as designed and I was very happy with how loud it is above the sounds of the traffic. The installation on my V-Star 1100 Classic was not that complicated. It can be installed by someone with an average mechanical ability and electrical aptitude. Torch gives the Stebel Nautilus Compact Dual Tone Air Horn a M.M.M. Rating of 9 out of 10.

Ride on,
Torch
Reblog this post [with Zemanta]

Automotive Forum


Tuesday, March 17, 2009

Attack of the U.F.M.


Attack of the U.F.M.

It all started on a sleepy autumn morning. I rode to work early, usually getting up around 4:30 – 4:40 am and left around 5:00 – 5:10 am. Needless to say I’m usually only partially awake at that time in the morning. I don my leathers and head out to the garage.

I opened the garage door and backed Mistress, my V-Star1100 Classic, out and got the rest of my gear on, gloves, face mask, clear riding glasses, and half helmet. I tucked my lunch inside my right saddlebag. It was cold enough outside that I had trouble keeping the glasses from fogging up when I breathed out my nose. I closed the garage door and proceeded to start the bike.

First I turned the ignition key all the way on. I made sure the choke, (fuel enrichment knob), was turned all the way on. Then, I made sure the fuel cut off valve was turned down to the on position remembering that if I do not turn the fuel knob back on, I will not make it out of my neighborhood with out running out of fuel and stalling the bike. Don’t ask me how I know. I pressed the cut of switch to the run position and hit the start button.

Mistress’s 1100 V-Twin roared to life. With the Cobra exhaust, you can bet my neighbors know when I leave in the morning. I slid the fuel enrichment knob, (works like a choke), over to idle her down some and headed carefully out of my driveway onto the dark, damp streets.

It was a cold, dark and foggy Monday morning. I turned out of my neighbor hood and headed eastbound on Cheek Sparger Road. I straightened out from the turn and started to accelerate. Just then, I caught some movement just barely visible at the far reaches of the headlamp and riding lights off the side of the road. At first I didn’t pay to much attention to it, thinking it’s probably just a rabbit on the side of the road hopping around.

Then I noticed the anomaly is headed perpendicularly to my track on the road and will cross right in front of me. That’s when I spotted the glowing white beady eyes of this creature fixated on my Mistress and myself, reflected from the lights. As I got closer I could make out its size. It was larger than an alley cat and more like the size of a small dog. Now I could make out some large teeth and huge fangs in a pointy snout and large whiskers with foam trailing out the corners of its mouth.

Just then I realized what the Unidentified Flying Marsupial was. It was a very angry opossum running at full gallop across the road and headed straight for me. It looked like it was out for blood. For all I knew it could be rabid. I raised the angle on my right wrist and Mistress responded by slowing down some, both of us hoping to throw the attackers timing off. I just new it was going to either try to get up underneath my front tire and knock me off my bike or just jump straight up for a death grip on my throat.

My change in speed to throw off the timing ploy did not work. My next tactic was to aim my V-Star 1100 right at it. Mistress nodded in agreement. The logic in this approach was that, if I tried to hit a moving target, more than likely I would fail. The gargantuan opossum was at a full out run and just fixing to spring at me, its claws glistened in the riding lamps, when its head hit my front tire. It made a hollow thump type sound.

At this point neither one of us could adjust the momentum we had built up. The killer slid underneath the path of the bike. I could feel the rear of the bike lift up as the rear tire ran over the marsupials head. I knew it was its head because if it had been its body the back end of the motorcycle would have bounced up a lot higher.

In a flash it was over. Mistress and I had thwarted a deadly attack from a killer opossum and barely survived. I tried to glance back behind me and saw nothing on the roadway. But it was foggy and dark so I might not have been able to see it. I called my wife when I got to work and asked her if she had seen anything in the road, she leaves for work right after me, she had not. I looked closely again at the scene of the assault on my way home and saw nothing. The Attacker had made a clean get away.

Opossums are the other brown meat and tastes like chicken, I would imagine. Otherwise, they can be just another large, rodent looking, Unidentified Flying Marsupial obstacle in the road. Most of the time, you only get to see them with their little feet sticking up stiffly. Yep, they are just another obstacle you have to watch out for while riding a motorcycle in the Texas suburbs.
What is the moral of this story? Be prepared at any time, any place, and any conditions to react to changes in road conditions or obstacles in your path. Also remember, not all obstacles hold still for you. Sometimes obstacles have a mind of their own.

Ride on,
Torch
Reblog this post [with Zemanta]

Saturday, March 14, 2009

A Tale Of Two Batteries


A Tale of Two Batteries

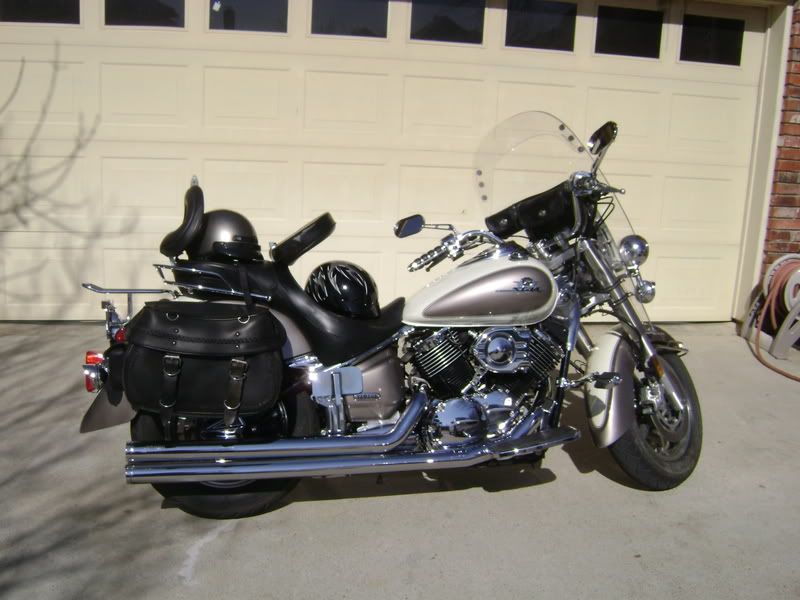
Mistress, my ’03 V-Star was whispering in my ear. Not literally of course, but she had been getting a little slower to crank in the morning. Being in the automotive industry I recognized the symptoms. The battery was getting weak. Being the professional procrastinator that I am, I ignored her. I did start plugging her into the Battery Tender Jr. on the weekends to make sure she would start for Monday morning commutes.

Then finally it happened one day after work. It went down on a day a cold front had blown in. I went out, hopped on her and hit the start button. Nothing happened. She whispered, “I told you...” I pondered my predicament a few minutes and called my wife to send one of the boys to come pick me up in our ’98 Ford Explorer. That was embarrassing. All leathered up and my bike just wouldn’t budge. I could have jumped her off but it was just much easier to call for a ride.

The next morning I grabbed an extension cord and my Battery Tender and had my wife drop me off. Fortunately, my workplace was on her way anyway. I connected her up to let the battery be tended to and came back on lunch break to see if she would start. She did. I left the tender on until I got off work. After work the mighty 100 V-Twin roared to life and I was headed home.

OK, here is the dumb part. Any smart individual would have checked the electrical system out and/or replaced the battery then. I have never claimed to be smart. I just left it on the Battery Tender all the time at home now. I milked that old battery along like that for another month to a month and a half. I had no idea how old that battery was or how long it had been in my V-Star.

Then it happened again. It was my night to work late and a cold one at that. I got bundled up to go home and, “Click”, nothing. Another phone call and another ride home in a cage.
The next morning I repeated the battery tender procedure and rode her home. I was determined to get another battery this time.

The first place I referenced about V-Star 1100 batteries was the V-Star 1100 Riders Knowledge Base. The Knowledge Base has a wealth of information and answers to just about any question V-Star related, including some questions that haven’t even been asked yet. It had a whole section on batteries. I read you could get a larger size battery that would fit. The stock battery on a V-Star is the YT14-B4 rated at 12 Amp Hours and 135 Cold Cranking Amps. A good replacement for it is the YT14-BS rated at 12 Amp Hours and 200 Cold Cranking Amps and is only 11/16” wider. That sounded like what I wanted, so I started searching for one. Somehow I overlooked the, “Batteries Plus (local source) - $49.99 -Charlottesville, Va on 2/6/06”, Partly because I had never heard of them.

I found what I was looking for at CBXMAN Motorcycles. It was a Binetto YTX14-BS High Performance AGM ATV/Motorcycle Battery. I ordered it and a balaclava and waited patiently. CBXMAN shipped my order right out and I was able to watch the shipping progress online at the shipping companies web site.
The order arrived a week later and I opened the package and removed the instructions for the battery. The Binetto battery came with very vague and sparse directions. What’s a guy to do with out pictures? They ship the battery dry and you have to install the acid and charge the battery before use. I decided to wait until Saturday afternoon to install the battery. I was scheduled to work a half day and would do it after lunch.

Saturday afternoon came around and I figured out how to open all the battery acid vials and pour them simultaneously into the six separate openings. When all the acid was in I hooked it up to my Battery Tender Jr. After it had charged for a while I topped it off with a little water. This turned out to be a mistake later on. I know, I know, you are supposed to use distilled water anyway. When the Battery Tender’s light turned green I knew it was time to install it on the bike.

Battery replacement on a V-Star is fairly simple. Remove the battery cover by unscrewing it’s hex bolt, unfasten the rubber strap that holds the battery in from the bottom, disconnect the negative battery cable and any other grounding cables attached to the negative post, then remove the positive cable and any other power cables attached to the positive post.

Installation is the exact reverse. I noticed that the Binetto battery posts were not that great of quality. The posts set too low in the battery. This made it hard to install round terminals on the front side of the post without distorting or bending the eyelets. The battery did fit fine into the battery opening space on the bike. However, the battery on a V-Star does not fit level; it sets at an angle with the right side, the negative side, higher than the left. This is where the topping off of the battery became a problem. All the excess acid when the battery was tilted came out he vent hole. I had to keep hosing it off the bike with the garden hose to keep the acid off the bike.

I got the motorcycle all put back together and tested the battery by starting the bike and it started up with no squabbles. I gave her a quick bath and ran her down to the gas station for a quick feeding. It started and ran fine for one week and then the dreaded no crank happened once again, this time in the morning before my ride to work. On top of that one of my garage door hinges had broken and I had to leave her outside until I could repair the garage door.

A few days later I went back the V-Star 1100 Riders Knowledge Base and printed out the PDF files on how to check the rectifier-regulator and stator in the charging system. I did al the checks and everything on the motorcycle passed the tests. I came to the conclusion that my new Binetto battery was defective. A coworker and fellow rider, Danny heard of my predicament and suggested a store near his home called Batteries Plus.

I called a local Interstate battery store and they had one but it was another one that you had to add the acid too, or “acis” as the typo on there website says. The Interstate battery was pretty pricey also and I believe it only came with a six month warranty.

Next I called Batteries Plus on Davis Boulevard in North Richland Hills Texas. I spoke with Robert, a helpful and knowledgeable counter person, who checked to see if they had an Xtreme battery in stock the size I needed. They did not have one but they would have a stock order of them in a couple of days. I asked if they were a sealed battery and he said they were. Then Robert checked to see if they had an X2-14 Xtreme battery the size I wanted in stock. They did have one. However, they did cost a little more. He explained that the X2 battery comes with a two year warranty instead of just one. I told him I would be by after work to pick one up. Browsing around their website I found a ten percent off coupon.

I also fired off an email inquiry to Yamaha Suzuki of Texas in Hurst from their website about the cost and availability of a battery, which they have not responded to, to this day.

After work I headed straight to Batteries Plus and met Robert. He grabbed the battery off the shelf for me, it was on display, put it back in its box making sure all of the hardware was there. It came with two height adapters and two spacers and bolts for side mount cable installations. I presented my 10% off coupon and Robert said they have a 20% off coupon that comes out in the paper and he would give that to me. I was not just pleasantly surprised; I was shocked at the offer and his dedication to customer service. Trust me; I will refer anyone looking for a battery for anything to check out Batteries Plus. If you live in the D/FW area, see Robert at the North Richland Hills location.

Here is the X2-14 Xtreme Battery description from the Batteries Plus website:

Choose an X2 battery to keep you powered. Designed for the vibration in an ATV and the endurance of a touring bike. X2 batteries offer the best features; fully sealed - maintenance free, pure calcium-lead plate design for increased power, easy to install with front mount threaded terminals and extended reserve power for more accessories. Backed by a full 24 month warranty, the X2 is the perfomance battery you have been seeking. The X2-14 has specific dimensions of 5.88" x 3.44" x 5.75".

I went home and installed it that evening. (The Binetto battery would not even crank the V-Star over after being on the Battery Tender for nearly a week now.) The installation of the X2 was much easier. The whole battery had a more professional fit and finish. The posts had plenty of clearance for the terminals and the height adapters, spacers and bolts were not needed on the V-Star installation. I did not even have to charge the battery to start the bike, it came fully charged.

The failure of the Binetto battery may have been caused by me and its lack of clear directions, I do not know. It was an expensive lesson to learn. There are some things that it is just better to purchase locally rather than online. And, you get what you pay for; some things are inexpensive for a reason. My Mistress has not been complaining to me since the X2 Xtreme Battery was put in several weeks ago and she has been starting every time I ask. On a scale of 1-10, Torch gives the X2 a M.M.M. Rating of 9.5.

Ride on,
Torch
Reblog this post [with Zemanta]

Sitemap


Wednesday, March 11, 2009

The Stench of the Ride


The Stench of the Ride

Sometimes trying to describe the nuances of riding on two wheels to the uninitiated is hard to do. Take for example smells. Being set free from the confines of a cage lets the surrounding scents in. The smell of the Waffle House on my commute to work in the morning most of the time is an aroma that will makes me want to stop and have breakfast. Riding by restaurant row in Grapevine on my way home I can sometimes pick out the smells of steaks cooking ad that gets my salivary glands all hyped up.

There are all kinds of scents that you notice when riding a motorcycle that you never have a chance to when driving an automobile. It is probably worse here in Texas where almost everyone has their windows rolled up and air conditioners running on max. Some of these smells are, like it is going to snow, smoke from a fireplace, someone grilling or smoking a brisket, imminent rain, flower or tree blossoms, piney woods, or coastal salty air. Not all scents are fun to smell though.

Then there are the bad odors, the diesels, the cars running too rich, the sewers, the dumps and landfills. Some food establishments may smell OK on the inside, but outside emit something that’s not quite pleasurable. Most fast food places are like that. Then there is the time Thomas Ramirez had his V-Star 650. We rode to lunch one day headed to one of our favorite restaurants called El Taco H. It is located right next to the Baja Grill and is like the fast food part of the Baja Grill.

We headed our way through downtown Grapevine and through some residential neighborhoods. We passed one older home with chain link fence with several dogs in the backyard. Then it hit us. The breeze must have blown just ever so slightly and we were slapped up side the head with the worst, foulest smell of dog do-do you ever smelt. I’m talking take your breath away, nauseous type of smell. It’s like when you are riding at highway speeds on a very windy day and a strong cross wind goes across your face and you cannot take a breath.

I attempted to hold my breath until we got further away. We came to the next stop sign and Thomas, catching his breath also, said, “Did you...” I cut him off with a laugh and we laughed together, shook our heads and twisted them off to go to lunch hoping to get our appetite back. Yes, not everything smells rosy when riding a motorcycle.

Ride on,
Torch
Reblog this post [with Zemanta]

Monday, March 9, 2009

Cold Riding Hands are Sluggish Riding Hands


River Road Cheyenne Cold Weather Gloves Review

This December my fingers were really getting cold during my morning commutes to work. I had been wearing a pair of inexpensive leather gloves purchased at Wal-Mart that had a thin Thinsulate liner. They worked great for driving a cage and if you were out of the wind. On a cold winter’s day though, at any speed over 40 mph, the cold wind sliced right through the seams. These gloves were not designed for motorcycling. I needed a pair of cold weather gloves.

I was off for the Christmas and New Years holidays and taking some vacation time from work and decided to take my V-Star in to get the front tire replaced. So, I was browsing my local Bikers Bay store while they were mounting a new front tire on my Mistress early on a Saturday morning. I looked at the gloves rack and found the River Road Cheyenne Cold Weather Gloves. The pricing was fair so I tried a pair on. They fit well despite my large hands although they sure felt bulky as all cold weather riding gloves will. I bought them and a neoprene face mask when my bikes front tire installation was complete.

The Cheyenne Cold Weather Gloves by River Road got their first trial as soon as my vacation and holiday time was up and it was time to get back to work. These gloves had a reinforced leather palm with good grip traction. The back side of the glove is made of a durable looking textile material. They have a breathable windproof Hipora liner they claimed was waterproof. These gloves are also equipped with a Thinsulate layer for warmth as well. They have two hook and loop adjustable fasteners one for the wrists and another for the cuffs. This makes them very adaptable. On top of that, they have reflective piping in several places on the seams for safety.

I have now ridden with them through our short Texas winter. These gloves kept my hands and wrist warm down to about 35 degrees Fahrenheit at 60+ mph. If it gets colder than that your fingers will still start to get cold. I would recommend a thermal glove liner to go with them when riding in temperatures freezing or below. I will invest in a pair of these for next winter. The gloves do an excellent job of blocking the wind. Finally, I also had the chance to wear them in the rain. I had my doubts, but the Cheyenne Cold Weather Gloves are indeed water proof. These River Road Gloves in conjunction with my frogg toggs kept me completely dry. The fact that I had dry and warm hands really impressed me.

The bulkiness of the gloves does have its cons, but the pros far outweigh them. If you have ever been caught in the cold without gloves, or just too lazy to pull over and put them on, and had to ride, you know what I mean. It takes a little adjusting to, to ride and use your motorcycles controls with the gloves on. The hardest thing to get used to for me was the starter button. However, I found that if I just kept moving my thumb around it would eventually make contact. They have held up good for the first winter riding season, although some may debate that Texas really does not have a winter season. Torch gives the River Road Cheyenne Cold Weather Gloves a M.M.M Rating of 9 on a scale of 1-10.

Ride on,
Torch
Reblog this post [with Zemanta]

Friday, March 6, 2009

A Variety of Bikes at Work

Several people where I work ride motorcycles. Some of them are what I call "Fair Weather Riders", they ride their bikes only when the weather is nice. A few, like myself, ride rain or shine. Either way they ride, and their motorcycles are all sharp. The bikes are a mix of all brands and styles and as unique as their personalities. I thought I would share some photos of some of the different motorcycles:

Kim's '94 Gold Wing. He just added chrome mirror trim rings with turn signals built in. He also has a '76 Gold Wing named, "Old Yeller", because of the bright yellow color. Old Yeller has a matching trailer as well.


David's 2004 Suzuki Hayabusa: 4 into 1 Yashimura Exhaust, Yoshi Program, TRE System, Custom Paint, Frame Sliders, Billit & Chrome Accessories, Mini Stalk Rear Blinkers, BMC Air-filter, BMC High Performance Coils, Blue Neon Light Kit, Steel Braided Brake Lines


Craig's Honda VTX 1800N: Cobra Exhaust, Power Commander, Blue light Kit, Riding Lights, Windshield, and more coming...


Gilberto's Kawasaki Vulcan 900 Classic LT. His wife rides a Honda Shadow.


Danny's '08 Honda VTX 1800T: Cobra Exhaust, Blue Light Kit, Lindby Engine Guards


My '03 V-Star 1100 Classic, "Mistress": See her list of adornments here.

There are several others that were not available at the time I was scouting for photos.

Ride on,
Torch
Reblog this post [with Zemanta]

2009 BMW 7 Series

The new 2009 BMW 7 Series does away with some of the more controversial features in the name of a cleaner, more streamlined design. The total package is more appealing to the eye, and speaks "German luxury" rather than "controversy." The upgrades to the 2009 BMW 7 Series do not stop at the surface, though. The top of the line 750i and 750Li models get a revised version of the excellent BMW V8 from the German sports car company's X6 Series. New also to the 2009 7 Series is an option for the excellent twin turbo inline 6 motor found in the 335i and 535i BMW models. This well-engineered engine offers decent fuel economy for a large German luxury car, while still providing great performance with upwards of 300 horsepower on tap.

Those luxury car types who passed on the last generation of BMW 7 Series luxury sedans may want to give the 2009 7 Series another look. Inside is a host of new technology, including a night vision system featuring what BMW calls pedestrian recognition technology, whatever that means. Some of the headaches of previous iDrive Navigation/Infotainment systems are supposed to have been worked out as well. Look for the 740i and 750i models at the end of 2008 coming as 2009 BMW models. The 12-cylinder 760Li flagship model will return later in 2009, as well.

2009 BMW 7 Series
2009 BMW 7 Series

2009 BMW 7 Series
2009 BMW 7 Series

2009 BMW 7 Series
2009 BMW 7 Series interior gauge

2009 BMW 7 Series
2009 BMW 7 Series

Thursday, March 5, 2009

A Harley To Die For


This truly is a Harley to die for. Here is a motorcycle gravestone spotted somewhere near Llano Texas. A coworkers husband shot this picture and shared it with me. I thought I'd share it with you, as the Picture of the Day. It looks like it's located in a place that manufactures headstones. I wonder if they could do a V-Star ?


Ride on,

Torch

When It Rains On A Motorcyclist, It Pours


Classic Pro Action frogg toggs Review

When it rains on a motorcyclist, it pours. I wanted to be able to ride my motorcycle every day possible, even in the rain. Soon after I got my Texas motorcycling License I began to research wet weather gear. I scoured the Internet reading blogs, forums, ads, and articles. One name that kept coming up was frogg toggs. The name really stands out and a lot of motorcyclists were recommending them. So I decided to check them out.

There I was again browsing around Cycle Gear again looking at motorcycle jackets, and anything else that caught my eye, when I saw a frogg toggs label. I looked at them and compared them to the other rain suites they had on display. The first thing I noticed was the Frogg Toggs were made of a thinner material making them much lighter and less bulky. The material itself felt like it had an almost waxy feeling to it. I picked up a black pair and headed toward the checkout with them. On the way I saw a sign that stated all the frogg toggs were on sale. It must have been my day.

A couple of months later I had purchased my V-Star1100 Classic. I kept the Toggs in my saddlebag. Thomas Ramirez and I rode to Bates Discount Cycle #2 to look at leathers, helmets and everything else. They had a fascinating frogg toggs display on the counter. It had water in it and showed how the frogg toggs material was 100% water proof, but would still breathe and let air through. I knew then that I had made a good choice in rain gear.

The frogg toggs Classic Pro Action jacket had 1 inch elastic bands on the waist and wrists. It is equipped with a nylon zipper and a protective storm flap that snaps closed. The snaps are nickel coated to prevent rust. They had adjustable locking draw chords around the hood opening. The hood rolls up and tucks neatly into the compartment in the collar designed for it and zips closed.

The frogg toggs pants have 8 inch zippers on the leg openings that make them easier to take on and off with boots on. The pants had 1 inch elastic bands on the leg openings. They came with adjustable locking draw chord around the pant waist. The toggs have right and left front pass through pockets so you can still get to things inside your regular pants pockets.

The rain suite is water proof, not just water resistant. This also means that they are wind proof. The toggs come with reflective piping around various seams to help you be more visible at night. To top all that off, the frogg toggs rain suite came with a small compact water proof duffel bag with locking draw chord to store them in. All these features made this rain suite a very attractive ensemble for a motorcyclist.

I commuted around for a couple months with the frogg toggs tucked away in my saddlebag. I got caught in some showers and downpours in the morning and afternoons coming and going to work. Finally, I got to test the frogg toggs first hand. I put them on with ease. They fit over my leathers and helmet just fine. They worked fantastically, and kept the rain out while driving down State Highway 121 in a downpour. The zipper, storm flap, elastic, and draw strings did a pretty good job of keeping the water from creeping into places you don’t want it to. I felt that they performed up to their reputation. Torch gives the Classic Pro Action frogg toggs a M.M.M. rating of 9 on a scale of 1-10.

Ride on,
Torch

Tuesday, March 3, 2009

Rider Down?


Rider Down?

Why do motorcycle forum and blog titles have to sound so negative when a rider does go down? I frequent a lot of motorcycle forums and blogs and I feel that a title like, “Rider Down”, is way too negative. Don’t get me wrong, I don’t mind hearing of someone in need. The least I can do is throw up a prayer to the big man upstairs, and post a get well soon message. I also enjoy the lessons gleaned from reading the information about what happened and the circumstances leading up to the infraction. If we all read and took heed, there would be less of these reports.

Most of the time if someone does go down they do not stay down permanently, they get back up. Even if it is fatal, they are now on their way someplace else, hopefully a better place. I try to be very optimistic about people and circumstances, always looking for the good in things. It is not always easy to do either because it is far simpler to find the negative aspects of everything.

How about changing our forum or blog titles to something a little more positive? How about these ideas:

Rider Up
Biker Getting Up
Rider Recovering
Biker Riding Again Soon
Rider Ready Soon
Biker Rising
Rider Been Down
Once Fallen

I do not know what would work. I just think there needs to be a positive lean to it. We definitely need to continue to support our fallen comrades, spiritually, mentally, and financially if possible. Everyone needs to be reminded of the inherent dangers of riding on two wheels and how to cautiously avoid becoming another statistic. Ride smarter not less frequently.

Ride on,
Torch
Reblog this post [with Zemanta]